Race Preparation Article 2
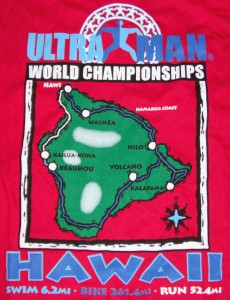
Preparing Your Bike for UltraMan World Championships
By David Cobb, Bike Course Director, UltraMan World Championships
The goal of this technical support reader for the UltraMan athletes (and their crews as well), is to provide helpful, useful information when preparing for this event. Maybe these tips will help you prevent common mechanical problems, and could save you some necessary time so you can get back on your bike and finish within the day’s 12-hour time limit. My sincere wish is for all athletes to finish this wonderful event knowing their bike and support equipment was in top shape, and that their equipment was never a limiting factor in achieving their goal.
First and foremost, have your bike thoroughly checked by a competent bike mechanic, preferably at your hometown bike shop, prior to leaving for Hawaii. This serves two purposes: first, it will identify any major issues that need repair prior to departure, giving you the time to repair any problems found; and second, it gives you that peace of mind in knowing that your bike is ready to go and in top mechanical shape. Always make your mechanic aware of any little thing about which you may have a question; some major problems start out as minor ones that were never addressed in time.
Two of the most commonly overlooked things that can go wrong with a bike are the shifting and braking. Get all shift and brake cables checked, and replace any that are rusted, frayed, or that do not perform at tip top level. That may also require replacing the cable housing as well, as rusted housing causes cable binding and unwanted friction. Brake and shift housing are specific, so don’t mix them up. Be sure to check the brake pads as well, and replace them if there is any doubt about mechanical reliability, or if they are near the “safety zone.” If in doubt, replace the pads. Make sure that the brake pads are free of embedded debris as this will eventually damage your rims, especially carbon rims. Also, check that the anchor bolts for the front and rear derailleurs are secure and properly oriented, especially with modern 10/11-speed shift systems. Another very important item to check is the alignment of your rear derailleur hanger, as a bent hanger will have a noticeably negative effect on shifting and chainline throughout the rear cogs and front chain rings. This is even more important in the 10-speed and 11-speed systems as the tolerances are so small. This check is best done by a qualified mechanic using a specific tool made for this purpose. This is also a check that may best be performed after your bike arrives in Hawaii, since derailleur hangers are often bent as a result of packing and shipping. With the advent of electrical shifting systems, it is a good idea to bring along a spare battery or just replace the one you have already, thus making sure that you arrive in Hawaii with a fully-charged battery.
Another major issue encountered is with tubular tires. To be blunt, it is imperative that the spares you’re using have been pre-stretched and pre-glued prior to using them in the event. My advice is to take care of this important chore well in advance of the event. Glue and stretch new spare tires, ride the spare tires for a few miles, then pack them away until needed in the event of a flat on your primary tires. It is much easier to mount a pre-stretched tire, and the glue already on the tire will bond strongly with the remaining glue on the tubular rim, provided there was an adequate amount of glue on the rim to begin with. My personal preparations have always been to put one good fresh coat of glue on the rim, two coats on all my spares, and then mount fresh, new tires on which I plan to begin the bike course. I recommend that you carry at least two spare sets of prepared tubular tires (4 spares), and, if possible, carry a separate, spare set of tubular wheels, to facilitate fast changes in the event of a flat, or in case one of your primary race wheels is damaged or non-functional in any way.
Another task I strongly encourage for tubular tires is taping and affixing valve extensions, on your primary race tires as well as ALL your spares. By taping, I mean the use of plumber’s tape around the threads of the tire’s valve, prior to affixing the valve extension. This practice will insure an airtight fit of the extensions, which are notorious for leaking if not properly sealed. Test-inflate the tires after you do this to insure that the presta valve is free and not closed off within the valve extension. If you can get air into the tires, start over and get it right. It is also very frustrating to use several CO2 cartridges trying to air up a tire only to have the majority of air leak out during inflation because of a leaky valve extension. If this task is beyond your ability, or that of your crew members, take the time to have your local bike shop do this before you get to Hawaii. As a note, an interim emergency measure that works well for sealing valves prior to extension installation is to use regular bar soap. This is a technique best demonstrated by someone who has done it before, but it does work in a pinch. It is not something I recommend if you have the time to tape the valves properly.
When it comes to clincher tires, my advice is to bring only long-valve spare tubes and avoid using valve extensions at all. Most of the better quality aero race wheels require more than the standard length tube valve, so lengths of 48mm or longer (up to 60mm) are encouraged. HED Deep aero and the newer ZIPP and Easton wheels require 80mm to 100mm extensions! If you’re using these types of wheels, make doubly sure you bring correct spare valve extenders of the required length. Make sure beforehand that all tubes you bring have the correct valve length for the wheels you’ll be using. Bringing just long-valve tubes, however, insures that you won’t have to deal with valves that are too short for any wheel you use. I would also recommend “powdering” your spares as well. This is easily accomplished by putting all your spare tubes in a freezer bag with a small amount of talcum powder. (And no, don’t put the freezer bags in the freezer!) Then, when and if you need to use them, they are much easier to install and are far less prone to pinching during installation. Putting a small bit of air in the tube just prior to installation, which one can do with one’s mouth, also helps installation and lessens pinch flats. Any good bike mechanic should be able to demonstrate this to you so both you and your crew can breeze through the occasional flat tire.
I recommend starting the race on fresh, new tires, or at least tires that don’t have many miles on them. There are several types of tires that are stronger and more flat resistant that the standard racing tires. The miniscule extra weight of these tires outweighs the advantage of using the thin, racing-type tires and getting repeated flats. Inspect carefully any used tires inside and out for cuts and/or embedded pieces of wire or thorn heads. These sometimes hidden and difficult to find items are the main cause of flats in Hawaii, in my experience. And have at least two pair of spare tires (all pre-glued if you’re using tubulars) with one set already mounted on your spare wheels.
With the 10 & 11-speed drive systems (Campagnolo, Shimano & SRAM), I encourage you to bring a pre-sized spare chain in your bike repair kit. The bike shops in Kona will have spare chains available, but obtaining a spare chain on the second day’s long ride around the Hamakua coast, if needed, likely won’t happen in any timely manner. Having a spare chain ready to install, and already at the correct link size, will make emergency repairs, by either your crew or the technical race support staff, much less of a hassle and most assuredly faster. Also bring a few brand-specific chain pins as well, just in case; or, bring the necessary “master links” specific to each brand’s chain. Make sure the pins are the correct ones for your drive system, meaning that 9-speed pins are only compatible with the 9-speed chains, etc… Campagnolo and Shimano chain pins are not interchangeable. Nor can a 9-speed chain be used with a 10/11-speed drive system, as they are too wide. You can use a 10-speed chain with a 9-speed system, however. If you’re using the universal master-link type chains, have a few spare snap-links ready to go, just in case.
I also want to put to rest the belief that one must have their bike chain (and other parts) swimming in lubricant in order to work properly. In fact, just the opposite is true. One need only impart a good sheen on the chain in order to provide the necessary lubrication. Anything more will attract more dirt and grime than it repels, and grimy chains are like sandpaper on a bike’s chainrings and cogs. I recommend thoroughly cleaning and degreasing the chain, either by removing and cleaning (which is most thorough) or by cleaning with Simple Green, or other non-toxic degreaser cleaner. Once the chain has dried, relubricate by putting your lube of choice on a small patch of rag, loosely clamp the rag around the chain, and spin the chain through the lube area by reverse-spinning the crankset. I assure you that this is all the lubrication a chain requires during dry weather riding, and depending on the miles of training one puts in, needs repeating only once or twice a week at most. If riding in wet weather, this should be repeated after every ride, but only after the chain has been cleaned and dried again prior to relubrication. The general rule of thumb is that, if the chain looks wet, it has too much lubrication on it, and the excess should be removed. I personally don’t like or recommend the “wax” based lubricants for Hawaii races because they tend to collect volcanic dust and grime faster than the other premium lubricants. I also don’t recommend using WD-40 as your primary lube because it is very light and volatile and evaporates quickly. It is good for cleaning a chain, however. If you get caught in the rain on Day 1 or Day 2, WD-40 will not last very long at all if you’re using this as your primary chain lubricant.
I recommend bringing several spare brake and derailleur cables, just to be on the safe side, even though the UltraMan tech support crew carries them as well. These can be purchased from your local bike shop, or when you get to Kona. Use only stainless steel cables, unless you’re already using any of the very high end cable systems with Teflon or other special enhancements, but that choice is up to you.
Because of the wide variety of bikes now, I encourage you to bring a spare seat clamp and/or seat pin specific to your seat post diameter and bike set-up, or a spare seat clamp collar, depending on your brand of bike and its components. These small items are usually one of the items damaged in a crash, but are easily replaced if you have one already available. Most of the modern, top-end aero bikes have specific seat tube clamps and other proprietary parts unique to that particular brand, and finding those parts in emergency will likely be impossible. So, bring those types of items in your repair kit and you’ll always have the necessary parts on hand!
Other items your may consider having as backups are:
a. Spare bike shoes with cleats already mounted and adjusted. Bring a spare cleat set, just in case.
b. Spare saddle and seatpost.
c. Replacement front and rear derailleurs
d. Replacement spokes for any premium race wheels (both drive and non-drive sides)
e. Replacement battery for bike computers and heart rate monitor (if needed)
f. Replacment hub skewers, front and rear
g. Replacement chain rings
In order to mitigate expenses involved with these items, ask your local bike shop if you can use “on consignment” any of these items you may not already have. That is, have them put on your account in case you have to use them, but if not used, return them in the original packaging and remove them from your account. It’s just an idea, and it won’t hurt to ask as long as you have a good relationship with your local shop. Fellow athletes are also a source to check for these parts. In any event, a bit of pre-planning on these things will go a long way to making your UltraMan World Championships stress-free and successful!
Should you or your race crew have specific questions prior to arrival in Hawaii, feel free to contact me via email at DPCpresto@gmail.com and I will do my best to respond quickly. If I don’t have a good answer, I will find someone who does have an answer. Above all, remember that there is no absolute correct way to accomplish some repairs, or to glue a tire and such. Many mechanics have little tricks and secrets they have learned over the years that make repairs faster, easier, or more secure. You would do well to consider as part of your preparations for UltraMan spending some time with a good mechanic, learning how to take care of things about which you’re unsure. I know my usual fee for this teaching is good beer, and I bet your mechanic would appreciate much the same fee! Aloha and have a great UltraMan event!
David Cobb